
Plaster Repair in Conroe, TX | Conroe Drywall Co.
Conroe Drywall Co. has provided plaster repair to homeowners and property managers throughout Conroe, Texas for over 15 years. If a wall flexes under your hand or sounds hollow when you knock on it, the plaster has separated from the backing that supports it. A lath and plaster wall is built over wood lath or gypsum panels called rock lath, and the hardened plaster that grips that backing forms the plaster key.
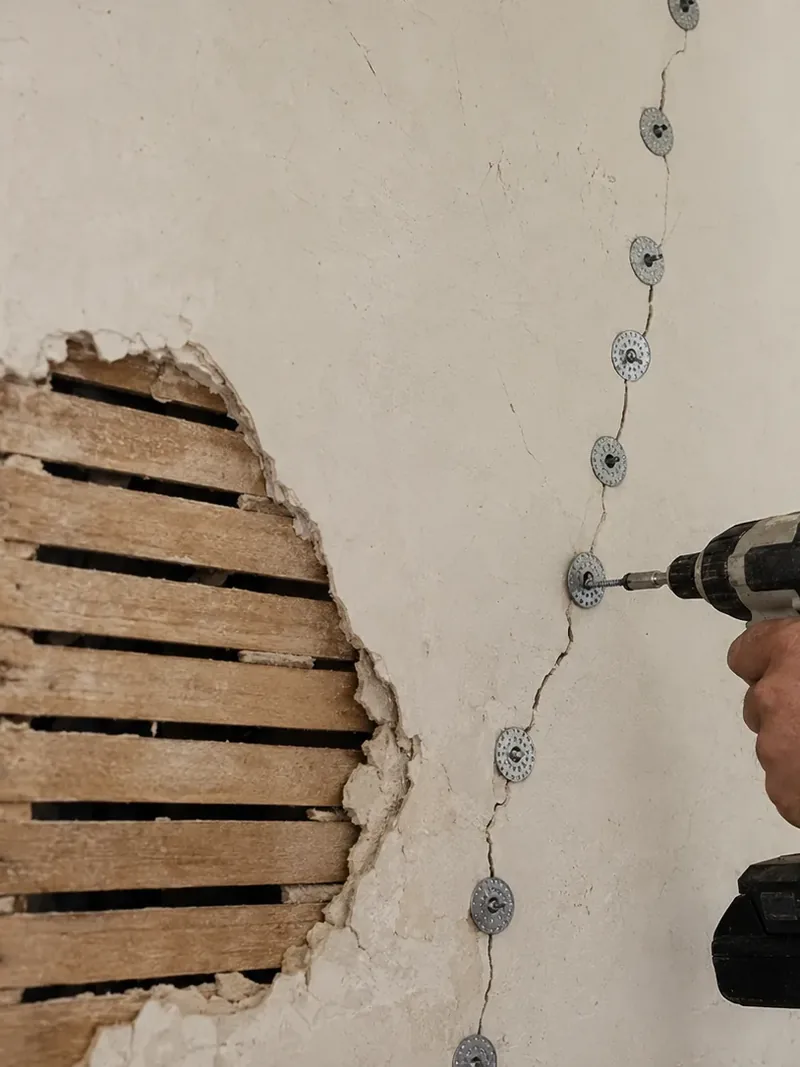
Plaster is not simply older drywall. A traditional plaster wall is built in three coats to about seven-eighths of an inch thick, and a repair copied from drywall work will fail again. We map the hollow areas, read the crack patterns, secure loose plaster with plaster washers, small perforated discs fastened with screws, then rebuild the damaged section with veneer plaster and blend it into the existing finish. Where drywall replaces plaster, ASTM C840 is the published standard for installation. Wallpaper stripping and textured ceiling removal are separate services.
We repair plaster walls throughout Conroe, Willis, Montgomery, the Lake Conroe communities and the rest of Montgomery County. The repair lasts because we address the cause instead of simply skimming over the damage. Call us at (346) 706-5743 for a free on-site estimate and a written price.
Get A Free Estimate
The Plaster Problems We Repair
Plaster is a wet material troweled over a backing, where it hardens into one continuous surface across the wall. That is why plaster wall repair is not the same repair simply scaled up or down.
You will find these walls in older parts of Conroe and in older homes throughout Montgomery County, where builders used gypsum plaster or lime plaster over lath instead of panels; newer subdivisions were built with board. Flat plaster and the plain returns around windows and doorways are within our scope, but running a cornice or casting ornamental enrichment is conservation work we do not offer.
Cracks That Follow the Lath, and Cracks That Do Not
Plaster cracks tell you what moved, and the pattern is what reveals it. Lath is the backing the plaster was pressed onto, and when that backing is wood, it runs in narrow courses across the studs, with strips about an inch wide spaced roughly an inch and a half apart. Cracks that repeat horizontally at regular intervals are usually tracing those lath courses behind the surface. A crack running diagonally from the head of a door or window is not following the backing; it is following movement in the building.
Fine cracking that spreads across an entire wall in a web points to the thin finish coat at the surface rather than the plaster beneath it. Drywall leaves a different pattern, with cracks forming along the taped seams where two panels meet, which is why the same crack patterns do not read the same way in both systems. We also look at how far the crack has opened, from a hairline you can barely catch with a fingernail to a quarter inch, and whether one side now sits higher than the other. Each detail is a clue, but none of them alone gives the conclusion.
Where the crack pattern points to movement in the structure itself, the cause needs to be evaluated by a qualified structural professional. We will tell you that rather than simply filling the crack and leaving the underlying problem in place.
Plaster That Has Come Loose From Its Lath
Delamination is loose plaster that is otherwise sound: the material has not crumbled or cracked through, but it is no longer bonded to the lath behind it. A wall in that condition flexes under your hand and sounds hollow when tapped.
The loose area can extend far beyond the crack or hole you can see, and overhead the risk is greater than it is on a wall. Plaster on wood lath weighs about eight to ten pounds per square foot, based on the material-weight tables used in structural design, and on a plaster ceiling that weight hangs from the remaining grip until enough of it releases and the section comes down. A visible bulge or soft belly in a wall is the same failure at a more advanced stage.
Holes, Blown-Out Areas and Damaged Edges
Plaster holes are places where material is missing rather than simply cracked: a doorknob punched through the wall, a three- or four-inch chase cut for a pipe or cable and never patched, an outside corner worn away by decades of furniture passing it, or plaster broken off around a window return. Damaged plaster of this kind is harder to repair than the same damage in board because there is no panel edge to cut back to, so the new work has to be tied securely into the material around it.
The lath behind a hole is frequently damaged along with the plaster, so it has to be made solid again before the repair can be rebuilt. Old plaster is brittle at a cut edge and tends to crumble farther as the work opens up, which means the sound edge is usually beyond the damage you first see. Corner repair brings its own question, because outside corners were built over a metal or wood bead that may have broken away with the plaster and needs to be replaced. A hole in gypsum board is a different repair and belongs to our drywall repair service.
Water-Stained and Softened Plaster
Water damaged plaster behaves differently from a crack or a hole because the material itself changes. As gypsum plaster absorbs water, it softens, the bond weakens, and its grip on the lath begins to fail, so a wall can be losing support while the surface still looks intact. A plaster ceiling stain is usually the first visible sign, but an old dry stain from a leak repaired years ago can look much like an active leak still running above it.
A moisture meter, a handheld instrument that measures how much water the material holds, tells us whether the stain is old and dry or still wet before we decide how to repair it. Stopping the leak at its source is a separate trade from ours, and that work has to come first: we rebuild nothing until the source is stopped and the lath and framing behind it read dry. Active mold or the moisture source itself may need another qualified trade first. We do not find, test for, treat or remove mold. Where gypsum board rather than plaster has been soaked, the rebuild belongs to our water damage repair service.
Where Old Plaster Meets Newer Drywall
Lath and plaster and modern board often meet within the same room. A removed wall, an added closet, or a remodel from the seventies can leave plaster on one side of a joint and gypsum board on the other. That drywall transition is a common place for cracks to return, for two reasons. The materials are different thicknesses, with half-inch board meeting plaster closer to seven-eighths of an inch, so their faces do not line up flush and the joint is not flat by itself.
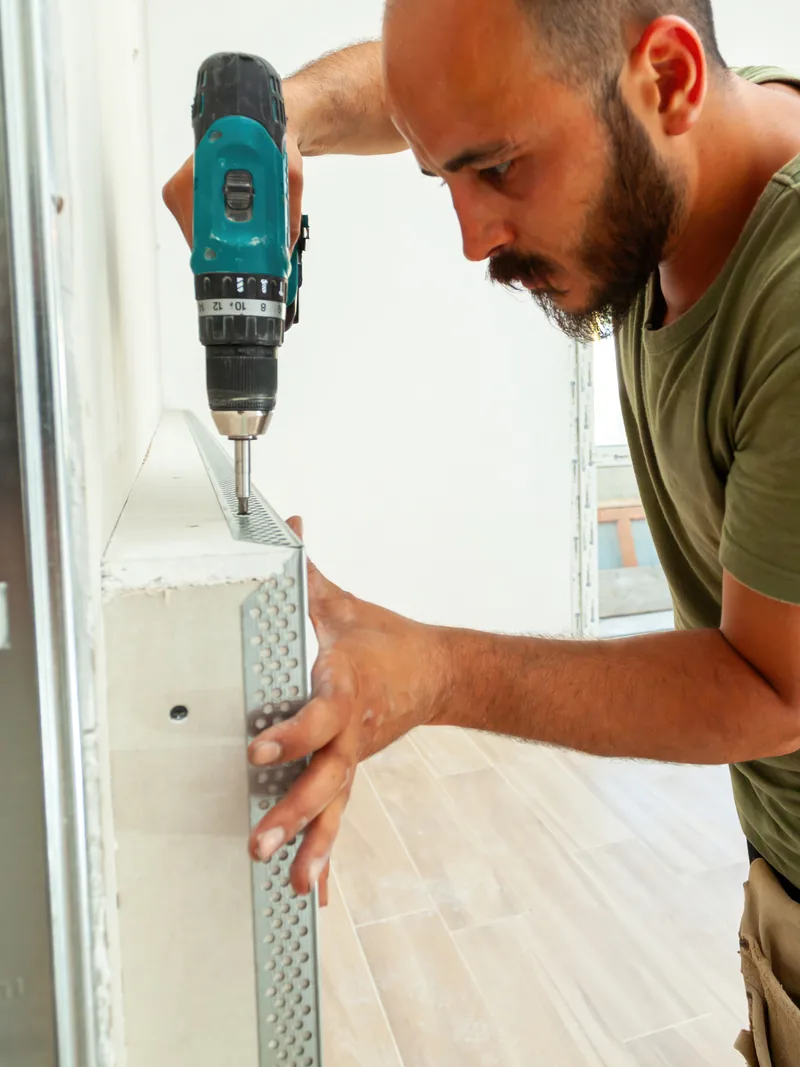
They also respond differently to the small movements a house makes through the year: plaster stays rigid while board flexes, putting stress on the seam between them. A plaster to drywall join taped like a seam between two sheets of board opens again within a season or two. The repair holds when both faces are brought into the same plane, either with furring strips that raise the thinner side or with a build-up coat feathered eighteen inches or more so the step disappears gradually instead of ending at one line.
Why Plaster Comes Loose and How We Find It
A drywall wall is made from gypsum board panels screwed to the framing, so the screws support the surface and the wall thickness comes from the board itself. Plaster goes on wet instead, troweled in three coats over a backing fixed across the studs, then hardens in place by gripping that backing rather than by being screwed or nailed through its face.
Much of Conroe's older housing was built before drywall replaced this method, so plaster wall repair here starts with the backing rather than the surface.
The Key Behind the Wall, and What Breaks It
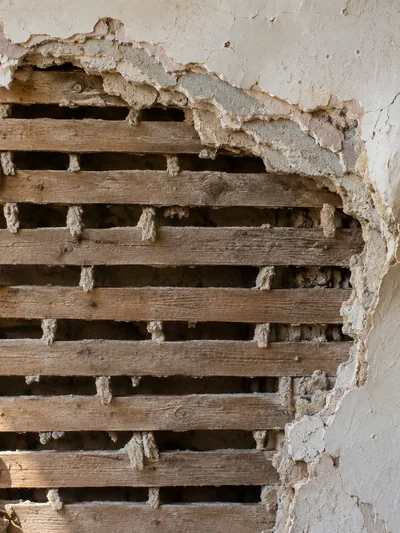
When the first coat was troweled on, the wet plaster squeezed through the gaps between the backing strips and curled over their backs, where it hardened into rows of small tongues. Those tongues form the plaster key, and that key is the only thing holding your wall up.
The scratch coat, the first layer, went on about three-eighths of an inch thick, with the wood lath behind it spaced about the same distance apart so the wet plaster could squeeze through and spread behind the strips. The brown coat followed, then a thin finish coat, building the wall to roughly seven-eighths of an inch, with the entire assembly supported by those hidden plaster keys.
Plaster keys fail a few at a time rather than all at once. The building moves and works them loose, traffic and slammed doors shear them off, and water softens them until they crumble. Because the wall face is one rigid slab, it can still look sound long after a broad area behind it has released, so the damage you see is rarely the full extent of the problem.
Wood Lath, Rock Lath and Which One You Have
Two types of backing sit behind nearly every plaster wall in this area, and the repair method depends on which one you have. Wood lath is the older system: thin sawn strips about a quarter inch thick, nailed in rows across the framing with gaps between them. From the late 1930s onward, rock lath, also sold as gypsum lath or button board, replaced it and remained in use until drywall took over the method entirely. Rock lath is a small gypsum panel, sixteen by forty-eight inches and three-eighths of an inch thick, with holes punched through it so the wet plaster could lock into the backing.
What sits behind the plaster determines what a screw can bite into and how a patched area is supported, so we identify the backing before quoting the repair. From the front, there are two main clues. Cracks that repeat in an even pattern across the wall usually trace the lath strips, while cracks that follow panel edges point to board. Tapping gives another clue because a solid strip sounds different from the hollow gap beside it.
When the Ground Under the House Is Moving
The clay soils beneath much of this area swell as they absorb water and shrink as they dry, and that movement travels through the footings into the walls above. Montgomery County has also experienced subsidence as groundwater is withdrawn: a study of aquifer compaction from 2000 to 2020 found that by the end of the period, about half the county was settling more than five millimeters a year. Because plaster is rigid while a board wall has some movement at its seams, foundation movement and expansive clay tend to show up sooner and more clearly as plaster cracks than they do on newer walls.
Movement is one possible cause of a crack, but it is not the only one, so we do not treat the crack itself as evidence about your slab, foundation or framing. What we can tell you is when the pattern points beyond plaster repair. If a crack reopens in the same place after a sound repair, the structure should be evaluated by another qualified professional, and that assessment is outside our scope.
Reading the Wall Before Anything Is Opened
Every plaster assessment begins with four checks, each answering a different question. Tapping the wall with a knuckle maps the loose area because plaster still keyed to its backing sounds solid, while plaster that has released sounds hollow. Light hand pressure over that area reveals flex you cannot see. Where a stain is present, a moisture meter shows whether the wall is still wet or has dried. If the backing is unknown, a small probe in an inconspicuous spot confirms whether it is wood or rock lath.
This comes first because the loose plaster usually extends beyond the area you can see or point to, so mapping it tells us how much of the wall needs to be opened. On ceilings, checking the framing and joist condition belongs to our ceiling repair service; structural assessment is outside the scope of this work.
How We Repair It
Each of the four repairs below restores the support the wall has lost instead of simply filling the gap left behind. We work from the back forward: first making the plaster secure to the wall again, then rebuilding the body of the plaster, and finally bringing the surface level with the surrounding finish.
Plaster Washers and Screws Into the Lath
A plaster washer is a small perforated metal disc, about an inch and a quarter across, that sits beneath a screw head and spreads the pull over a wider area so the screw does not punch straight through the plaster.
The screws pass through the washer and plaster and bite into the lath or framing behind them. We space them about three to four inches apart across the loose area so the load is shared instead of concentrated at one fixing. Each screw is tightened gradually, working across the whole area in passes, because pulling brittle plaster tight too quickly can crack the material you are trying to save. The perforations in the washer give the finish coat something to grip, allowing the discs to disappear beneath the repair. Federal historic-preservation guidance describes the same method for re-securing loose plaster.
Filling, Reinforcing and Re-Keying a Crack
Plaster crack repair starts by opening the crack back to solid material on both sides, so the new fill bonds to firm plaster instead of loose, crumbling edges. We fill it with setting-type compound, which hardens through a chemical reaction rather than by drying, so it keeps its volume against the rigid plaster edge instead of shrinking away from it.
Mesh tape or paper tape laid across the crack carries the new material over the gap; without it, the fill sits in the crack like a plug and the old line shows through again. If the plaster behind the crack is loose, plaster washers go in first, because a reinforced fill over a wall that still moves will separate again. Setting compound comes in 20-, 45- and 90-minute grades, and the repair is built in several coats, each feathered wider than the one before it.
Veneer Plaster Over a Rebuilt Area
Veneer plaster is a thin, hard finish coat, about a sixteenth to an eighth of an inch thick, applied over the prepared repair as the new surface. It sets hard like the surrounding plaster instead of remaining soft like filler, so the repaired area takes wear and paint at the same rate as the rest of the wall without drying dull beside it.
The old surface is treated with a bonding agent first so the new coat grips properly, and where the loss is deeper than a skim coat can span, gypsum base board goes in behind the veneer to support it. Veneer plaster is not the right repair while the backing is still loose or the wall remains wet. Matching an existing texture over the finished area belongs to our finishing and texturing service.
Where Board Replaces Plaster, and How the Two Meet Flush
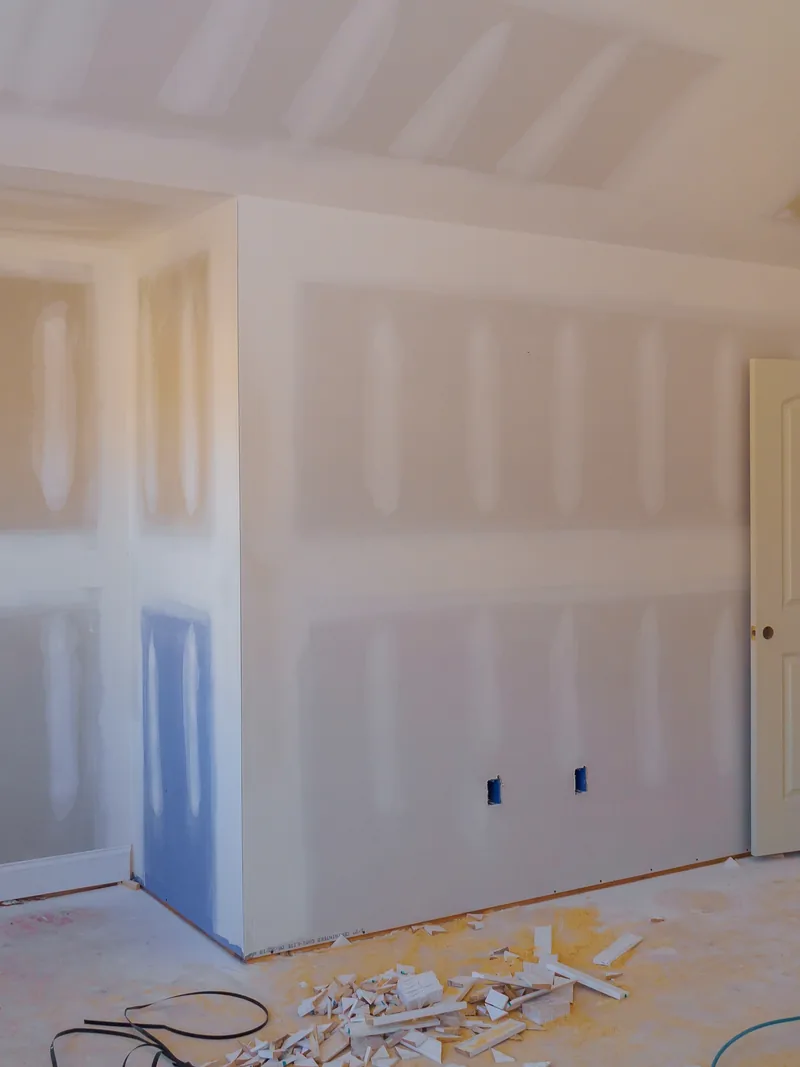
Where the damage is beyond repair, we cut it back to a clean square at the framing and fill the opening with gypsum board. Because plaster is thicker than board, the new board is furred out or built up, usually by three-eighths of an inch, until its face sits flush with the surrounding plaster, which is what allows the finished join to disappear. ASTM C840, the published industry standard for gypsum board construction, sets out how the board is fastened and finished. The plaster to drywall join is then treated as a transition between two different materials, not as a seam between two boards.
Why Choose Conroe Drywall Co. for Plaster Repair
Three decisions determine how your job proceeds:
- We preserve plaster wherever it is still sound, using plaster washers set into solid lath instead of tearing out a wall that still has years of service left.
- We map the full loose area before pricing the work, so the price you receive covers the plaster that actually needs repair.
- Where a section is beyond saving, we rebuild it with veneer plaster so the repaired area performs like the plaster around it.
All three come from experience working inside homes built the same way as yours, from the older streets around downtown Conroe to communities across Montgomery County, so we arrive knowing what backing and wall thickness to expect.
Conroe Drywall Co. has been repairing plaster and drywall for over 15 years. We are insured and follow established industry practices, including ASTM C840 standards for gypsum board installation and finishing. Our on-site estimates are free, and financing is available for larger projects. Call us at (346) 706-5743 to arrange a time for us to look at the wall. We respond promptly to any warranty-related concerns that might arise.
Repair or Replace, and What Plaster Repair Costs
Plaster wall repair is priced from what we find after checking the wall by hand, not from a rate card. The visible crack or hole rarely shows how much has let go, because the plaster still holding to its backing usually ends well outside it, and a photograph cannot show how far that loose area reaches.
We find the whole loose area first, then price the repair from what actually needs work. The on-site assessment is free. Published drywall repair ranges apply to drywall only and do not translate to plaster, so nothing about plaster repair cost is set by them.
Why Two Cracks the Same Length Price Differently
Six cost factors move a plaster price, and the length of the crack is not one of them.
- The amount of loose plaster around the visible damage sets the size of the repair, so delamination extending well beyond the crack costs more than damage confined to its edges.
- Whether the backing is wood lath or rock lath, and whether that backing is still sound, determines how much of the area can be refixed. Broken backing has to be rebuilt instead of simply screwed back into place, which adds labor and time.
- Overhead work costs more than the same repair on a wall because the material has to be held against gravity while it sets, making the work slower.
- Ceiling height and room access determine whether scaffolding is needed. A high or vaulted ceiling usually requires it, and both setup and removal are included in the price.
- A rebuilt area takes two to three coats, with each coat drying before the next is applied, so additional coats mean additional visits.
- A textured surround takes longer to blend than a flat surface because the new finish has to be worked to match the existing pattern around it.
Repairing Plaster Against Boarding the Wall Over
The repair or replace plaster question turns on how much of the wall is still sound and doing its job. If the plaster itself is solid and only one area has come loose, refixing that section is the better approach, and most single-wall repairs fall into this category. Original surfaces are also worth preserving in their own right, because details such as a molded edge or curved corner are not reproduced by new board.
The answer changes when delamination has spread across an entire room, when wood lath has failed along the length of a ceiling, or when repeated patching has left little original plaster worth preserving. Boarding over plaster means leaving the existing surface in place and fixing half-inch gypsum board across it to create a new face. Boarding out means stripping everything back to the framing and rebuilding the surface with veneer plaster or board. Which approach we recommend depends on what the wall shows us, and we will tell you clearly which condition you have.
Call us at (346) 706-5743 or use the quote form to have your plaster repair priced from the wall itself.
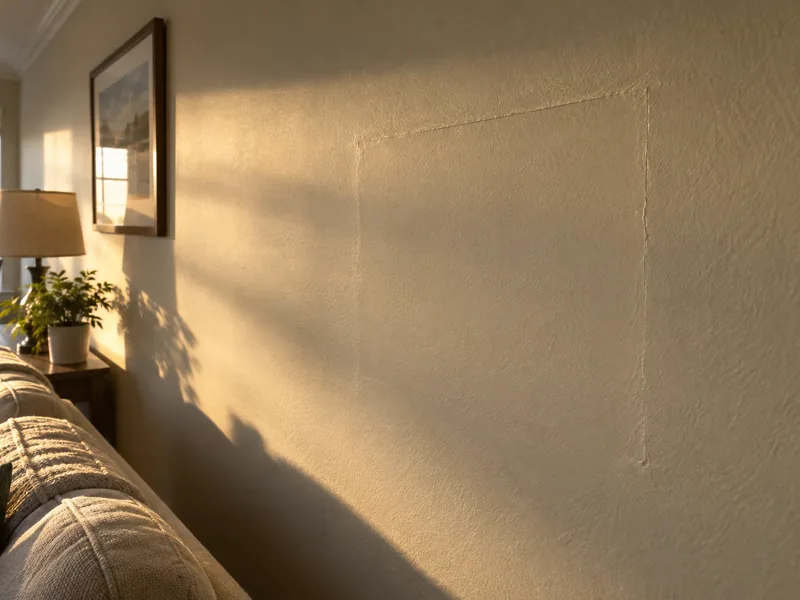
What Your Plaster Repair Looks Like
A plaster repair with Conroe Drywall Co. follows five steps, from your first call through the final walk-through. Each step asks for something simple from you and gives you a clear result in return, with the process arranged so nothing in your home is opened until you have agreed in writing to the scope and price. The steps below cover your side of the plaster repair process: what to tell us, what to move, and what to expect at each stage.
-
1
Tell Us What the Plaster Is Doing
One call books the visit. Tell us where the damage is, whether the wall gives when you press it, and whether there is a brown or yellow stain anywhere near it. A photo settles more in a few seconds than a description manages in several minutes, so send one if you can. Mention roughly how old your house is as well, because the age narrows what is behind the plaster before we arrive.
-
2
The On-Site Assessment
We come out and map the loose area, not only the crack you called about. Where there is a stain, we take a moisture reading before any scope is set. We also identify the backing behind your plaster, which changes what the repair involves. A single room usually takes under an hour, and the on-site estimate is free.
-
3
The Written Scope and Price
You then receive a written estimate naming the mapped area, the method we have chosen for it, and the number of visits the coats will take. It also states what is not included: we prime the repair so it is ready for paint, and finish painting is a separate service we quote on its own. You will not see an invoice for anything the estimate did not name.
-
4
Repair Days, and What You Need to Clear
Before anything is opened, furniture is moved out or covered with drop cloths and the floors are protected. We contain the dust at the doorway and clean the space down at the end of each day. Plan on the room being out of use between coats, and on more than one visit for most rebuilds, because a coat that is still damp will not carry the one above it.
-
5
Priming and the Walk-Through
We prime the repaired area so it accepts paint the way the rest of the wall does. Fresh material still takes paint at a slightly different sheen from paint that has sat on a wall for years, so the repair disappears most reliably when you repaint out to a natural break, such as a corner or a run of trim, rather than spotting it in. At the walk-through we look at the finished area under the room's own light and from several angles, and anything wanting another pass is named there.
To get started, call us at (346) 706-5743 or send the quote form, and we will schedule a time to inspect the wall in person.
Old Plaster Coatings and Testing Before Disturbance
A wall that has stood for eighty years has likely been painted, papered and re-textured many times, with all of those layers sitting over the gypsum plaster beneath them. Before we cut or sand old plaster, we first establish two things: what the surface coating is made of, and what lies beneath the paper and paint. Both answers affect how your repair is done, and neither can be determined just by looking across the room.
Coatings Over Old Plaster, and Testing Before Anything Is Disturbed
A textured coating is the raised or stippled finish sprayed or troweled onto a ceiling or wall to hide joints and create a pattern. When that coating was applied decades ago, its ingredients cannot be identified by appearance alone, so the age of the house is what tells us to stop and check before disturbing it.
Texture installed before 1990 can contain asbestos, so we arrange lab testing before any scraping begins and remove only material the results clear as safe. A sample is sent to a laboratory, and the result returns in a few working days, which determines when work on that surface can begin. Left intact and undisturbed, this type of coating presents little risk; sanding or cutting is what releases material into the air, which is why we settle that question first. If the entire textured ceiling is being removed, the work belongs to our popcorn ceiling removal service rather than a plaster repair.
Paint Build-Up, Wallpaper and What Is Under Them
Paint build-up is the accumulated stack of coats left by years of repainting, and on a century-old wall it can become thick enough to bridge a crack and soften its edges. That can hide where the sound plaster actually begins, so we work to the solid edge found by tapping rather than the line you can see.
Paint build-up also blocks the bonding agent, the liquid brushed onto the old surface so new material can grip it, because it cannot reach the plaster through layers of dried paint. Wallpaper creates the opposite problem. If paper was hung directly onto bare plaster without a size coat to seal it first, it can bond so tightly to the finish coat that removing the paper pulls the plaster finish away with it, turning a wallpaper removal job into a plaster repair partway through. We tell you about that risk before the first strip is removed.
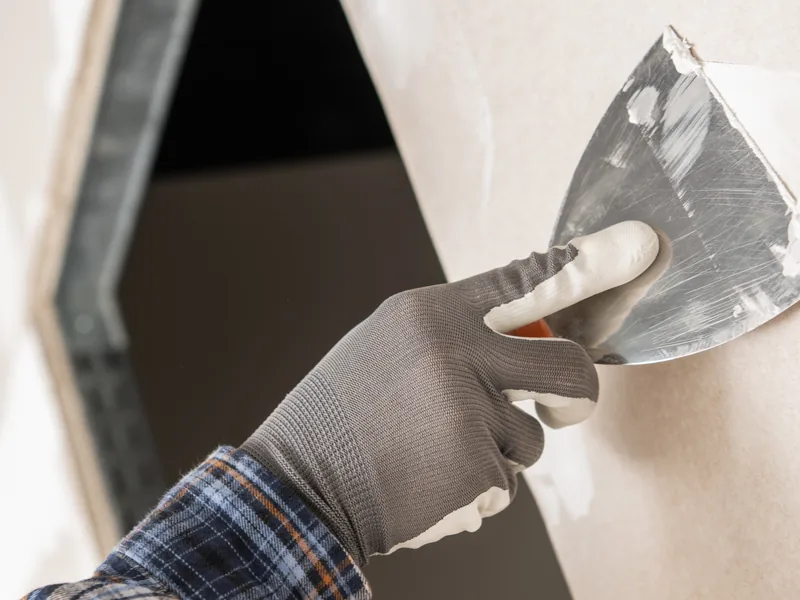
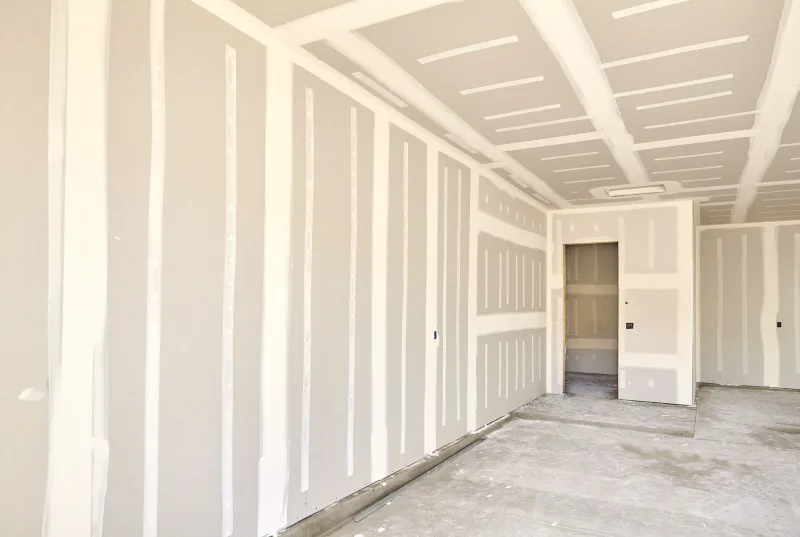
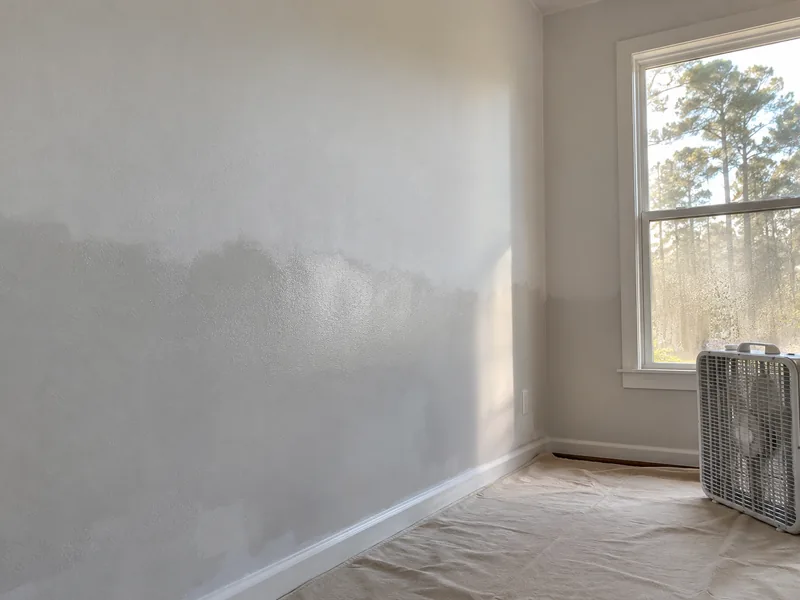
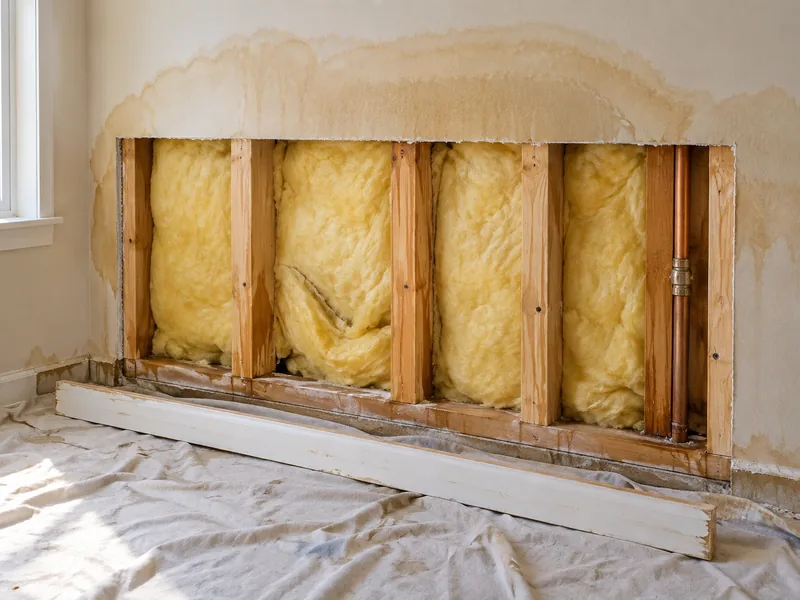
Humidity, Drying Time and Why Plaster Work Takes Longer Here
Plaster repair is governed more by waiting time than working time. The hours spent troweling are only a small part of the job; most of the schedule is the wall curing, the chemical hardening wet material goes through before the next layer can be applied. Conroe's humid subtropical climate stretches each of those waits, so a small repair can still take several days. You are not being slow-walked.
Why a Coat Rushed in Humid Air Shows Later
Setting-type compound and veneer plaster do not harden by drying. They set through a chemical reaction that takes water into the material itself, and that process follows its own schedule regardless of the weather. Humid air slows what comes afterward: the remaining water still has to leave the wall before another coat or paint goes on, and it can only evaporate into air with enough capacity to take it. In a humid room, a coat that has already set can still need a full day to dry enough for the next layer.
Cover a coat before it is fully dry and it keeps shrinking underneath, which shows up later as a hairline around the edge of the patch or a dull spot after painting. Moving air across the wall speeds drying, and a dehumidifier in the room helps even more. A faster-setting grade of compound shortens the working schedule as well, but gives less time to smooth the material before it hardens.
When Plaster Work Is Easiest to Schedule
The Conroe climate is more forgiving for this work than it first sounds because the long cooling season keeps homes closed and air-conditioned for much of the year, and a conditioned room is drier than the air outside. Running your air conditioning normally during the job and keeping the repaired room closed does more for curing than anything else you control. What you cannot control is the weather that brings the damage to light: wet periods and storm season slow every coat and are also when stained, softened plaster tends to show up.

Plaster Repair Across Conroe and Montgomery County
Plaster is found mainly in the older homes here, concentrated in and around the county seat and other long-established communities rather than in newer subdivisions. Those newer houses are built with board throughout, which requires a different repair and different materials. Montgomery County receives about 51 inches of rain a year, and the humid air that comes with it affects every community listed below, so gypsum plaster dries slowly in Willis just as it does in Conroe. The age of your house tells us more about what is behind the wall than the address does.
Where Conroe Drywall Co. Repairs Plaster
Conroe Drywall Co. sends the same plaster repair crews to all 21 communities we serve, grouped below by location.
Conroe Neighborhoods and Communities
- Grand Central Park
- Graystone Hills
- Rivershire
- Stewarts Forest
- Downtown Conroe
- Wedgewood
- West Fork
- Tejas Creek
Surrounding Cities and Communities
- Willis
- Montgomery
- New Caney
- Splendora
- New Waverly
- Cut and Shoot
- Panorama Village
- Grangerland
- Plantersville
Lake Conroe Communities
- Lake Conroe
- Bentwater
- Walden on Lake Conroe
- April Sound
FAQ
Plaster Repair Questions
Can I use drywall repair on plaster?
Partly. Setting-type compound and fiberglass mesh tape work on plaster just as they do on board, so those materials carry over. The repair method does not. A drywall crack is filled and taped, but plaster that has separated from its lath has to be secured back to the lath first. Fill the crack without refixing the loose plaster and the patch moves with the wall around it.
How much does it cost to patch plaster?
The price depends on how much plaster has come loose, and that loose area usually extends beyond the damage you can see, so any price given over the phone would be a guess before the true edge has been found. We come out, map the full area and then quote the repair, and that visit is free. Our published drywall repair ranges are for board and do not apply to plaster.
How do I repair damaged plaster on my ceiling?
Overhead, the plaster's own weight hangs from the same keys that have already started to fail, and plaster on lath runs eight to ten pounds a square foot. Sagging plaster above your head is not a homeowner repair, and the loose material has to be secured before any cracks or gaps are filled. If the ceiling itself is moving, that is ceiling repair, not a plaster patch.
Do plaster washers stay in the wall?
Yes. Plaster washers are permanent fixings, not temporary clamps, and the coats applied afterward bury them completely. Compound locks through the perforations instead of resting on a smooth metal surface, so the washers do not show through the finished wall once it is painted.
How long does a plaster repair take?
Count visits rather than hours, because the waiting time sets the schedule. A refix and crack repair can be completed in one visit, while a rebuilt area needs each coat to harden before the next is applied. Damp air extends those waits, and your estimate tells you how many visits the repair will require.
Can we stay in the house while you work?
Most people do. Only the room being repaired is out of use, and it stays closed while the coats harden between visits. The rest of the house remains in normal use, so you do not need to move out for a plaster repair.
If your question is not answered here, call us at (346) 706-5743 or send the details through the quote form.
Get Your Plaster Looked At
Plaster cannot be priced accurately from a description alone, so Conroe Drywall Co. comes to your home and inspects the wall in person. The visit is free, and afterward you receive a written price based on the exact area we found needs repair. Call (346) 706-5743 or use our quote form for a clear price on your project.